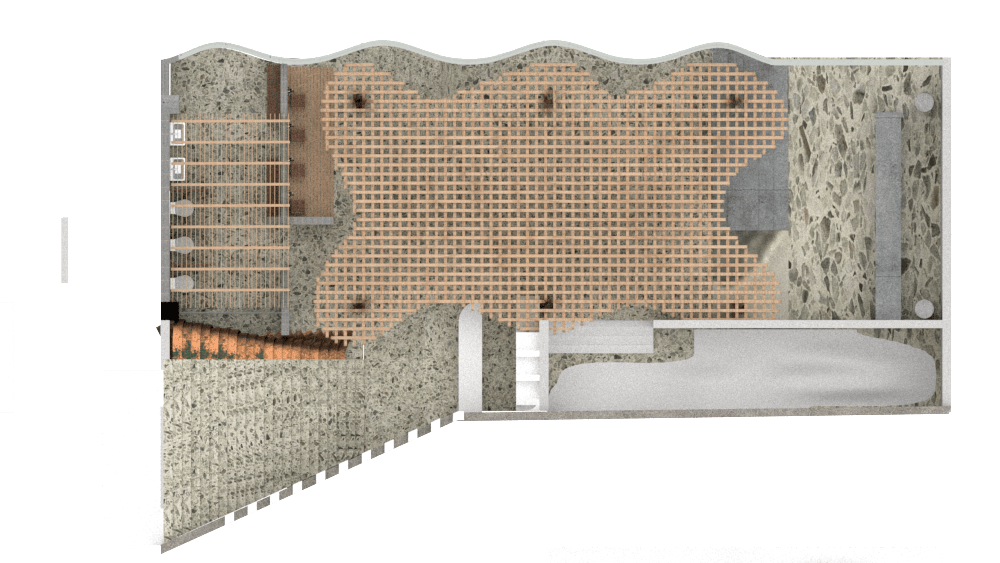
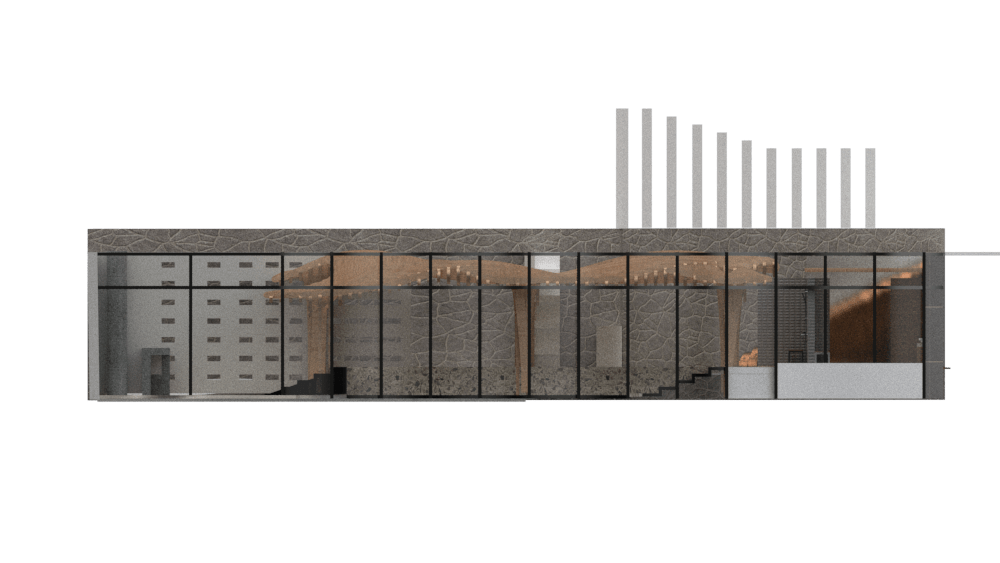
Above I have included a couple of progress shots of my Rhino 3D model. These are taken via screen capture in rendered view. They are just an initial indication of how the space is looking. As you can see there is no water in the pool area and there are only basic materials.
I plan to V-Ray render the space, with custom materials and lighting conditions. I will do a future blog post about this process and the experimentation behind it.
A waffle frame or consists of a particular geometric shape repeated in a waffle like fashion in order to form a solid form, They usually consist of several interlocking panels or sections that are arranged an equal distance from one another. Fascinated by this concept I decided to explore the potential of waffle frames. Below are a couple of images I stumbled upon.
After discovering these images I was opened up to the world of potential this medium has. Not only does it crate a strong frame it also allows for curved forms, perfect for my design. I will implementing this into my modelling and will make a frame to laser cut.
My Digital Modelling Process involved several steps:
First of all I had to set up my Rhino document to the correct dimensions. I originally attempted to make it in 1:1 scale, however this didn’t end up working as the file size was too large and it caused the software to lag. Instead I reverted to 1:100 scale, This would also be helpful for when it comes to making my model, as most of the measurements would be to scale already.
So to start off i took the basement floorplan of WW and inserted it into rhino. I then scaled it to the correct dimensions (1:100). From here I traced around the existing walls to create the current space.
I then started to create my own interventions by adapting and remodelling the space. I went off my floor plan that I created above.
Initially I started to make what I had previously thought out and majorly of the design is done like this. However what I find interesting about the 3D modelling process is that along the way you create new spaces and come up with new ideas to add or change the space.
Usually these ideas come from me discovering a new tool and the capabilities it has. For example, there is a tool named “blend surfaces” This tool helped me to create a lot of the geometry throughout the space. It was especially helpful in making “The Canopy”. I will go into more detail about this in the next blog post.
I have found that as my Rhino skills have evolved over the year I am more capable of creating more realistic models. This is a big advantage when it comes to V-Ray rendering as it will be more affective.
One lesson that I have learnt on my 3D modelling journey is that “layers” . are your lord and saviour. In the beginning I wouldn’t use layers at all, I thought that it was all too hard to assign each layer to a different component and a waste of time. But now I can’t model with out them. Especially in larger scale projects with lost of moving parts. It is paramount to organise your layers into a comprehendible format, otherwise you will get lost.
Materials play an important role in creating an interior environment. The materials that you choose to use have a large impact on the atmospheric conditions of the space. Different textures and colours portray different emotions and getting the right balance is very important. It all depends of the aesthetic that you are trying to achieve and the mood you want to create.
Being a bathhouse, there are also some extra factors to consider. For example the texture of the floor can’t be too polished as this will cause people to slip a more rough textured surface would be more suited.
I decided to go with a nice clean and simple aesthetic utilising concrete and wood. I will go into further detail regards the specific materials I intend to use.
Above is a mood-board/colour pallet that we were asked to make in studio. It allows one to get a brief idea into the type of style you’re going for. As you can see the colour pallet is quite neutral and somewhat organic.
I am a big fan of polished exposed aggregate concrete. The photo included in the mood-board is the standard, and is very commonly used. The other day I was visiting Newmarket mall and I came across this unique shop fit-out.
This was a new style of exposed aggregate that I haven’t seen before and this opened my mind up to the possibility of there being further variation. So I decided to do some digging and took road trip to The Tile People a tile and stone shop based in Parnell.
I instantly was drawn to this sample. It’s a large mixed chip exposed LMC, so I don’t think that it is concrete but an artificial substitute. However I really enjoyed the colour that this surface had. I feel as if it would create a brighter, happier environment.
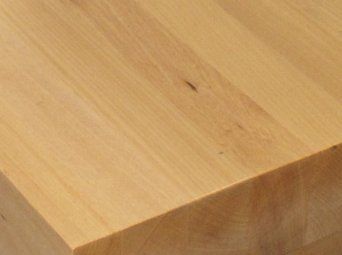
I also wanted to include some sort of timber in my design as I am thinking that I will create an artificial treetop canopy, and in keeping with the Te Aranga Design principles I would like this would to be sourced locally. I did some research into New Zealand native timber and came to the conclusion of using Tawa Timber.
Botanical name: Beilschmiedia tawa
Other common names: Tawa
Strength: Tawa is a high density, very strong timber.
Durability: Both the heartwood and sapwood are non-durable.
Finishes: Tawa can be stained and polished readily.
Tawa has a similar aesthetic than that of Pine but can be sustainable sourced from local providers
“All New Zealand indigenous timbers are now sourced from privately owned forests. These forests are required to be managed to exacting standards under detailed long term Sustainable Management Plans.” http://www.nzwood.co.nz/forestry-2/tawa/
Following up on my previous blog post about my concept inspiration Tane Mahuta, I have done some quick sketches to help explain what I am thinking of doing to the existing pillars in the basement bathhouse space. The current pillars are just standard and square in shape. I am wanting to either add or replace them with pillars that have a closer resemblance to a trees. In turn it will be as if the new pillars are holding up the roof which could be interpreted as a tree canopy.
I took think Ideal into Rhino and created some prototypes that I ended up 3D printing.
I am very pleased with how they turned out, much better than I expected. They possess such a fluid and organic shape that will help to soften the space.
This painting by Jane Crisp portrays Tane Mahuta separating his parents Papatuanuku, the Earth mother, and Ranginui, the Sky father.”
“In the beginning there was no sky, no sea no earth and no Gods. There was only darkness, only Te Kore, the Nothingness. From this nothingness, the primal parents of the Maori came, Papatuanuku, the Earth mother, and Ranginui, the Sky father.”
This is an extract from the Maori creation mythology story. Papatuanuku and Ranginui came together, embracing in the darkness. Together they had 70 children who became the Gods of Maori. However they were stuck. Wedged between their parents, eager to find light. Collectively they decided that something had to be done and consulted one another. “Let us kill our parents” said Tumatauenga, the God of War, however this wasn’t an option. Tane Mahuta, the God of man, forests, and all which inhabits the forests, thought that Rangi and Papa should be separated. The other agreed and they got to work.
Many of the children tired to separate their parents with their respective qualities but they all failed, no one could do it. It was all down to Tane Mahuta, he rose strong, placing his back against his mother and his feet against his father and pushed with all his might. Rangi and Papa cried in pain, asking their sons” why do you wish to destroy our love? After a long time Tane finally managed to separate his parents flooding tin he space with light and in turn providing freedom to his fellow gods and brothers.
The painting “Triumph by Jane Crisp” portrays the particular moment in the Maori creation myth in which Tane Mahuta successfully separates his parents.
The painting truly captures the moment of separation and does really well in illustrating the immense strength that was required. When thinking about the bathhouse space and how this moment could be incorporated, I am reminded of the pillars. The pillars play the same part in holding up the building and “separating” the floors allowing for the space to exist. Although it seems as if there is an overabundance of pillars in such a small space, they are required for the structural integrity of the building and are an element that cannot be ignored.
So taking this thinking and applying it to the bathhouse space, I am wanting to further explore the idea of re shaping the pillars into more natural forms possibly designing them to branch out, in turn celebrating the pillars rather than trying to hide them like I thought previously. The feasibility of this is uncertain, however I plan to implement some element of this idea into my design. Further research to follow (Rhino Modelling)
There is the possibility for the implementation of Photocatalytic materials for air purification on the exterior facade of the bathhouse proposal.
It involves adding Photocatalytic Titanium Dioxide to concrete. The chemical reacts with the light to reduce certain pollutants in the air, steadily purifying the atmosphere. In some cases this technology has been called “smog eating”.
not sure how viable this would be in such a small scenario, but it would be forward thinking in regards to protecting the environment. Most environmental design decisions are based on reducing the effects on the environment, for example where materials are sauced and etc. But why not be proactive and contribute to fighting the problems at hand.
The lighting conditions of the site as mentioned in a previous blog post are far from ideal. Nestled in and amongst tall buildings at the boundaries there wasn’t much room for light to filter in. I researched the possibility of having some sort of light filtration mirror system and I referenced the existing light diffuser in the top floors of the WZ building. It consists of several mirrors that redirect natural light downwards into the atrium and the lower less light . exposed floors.
I thought that a possible version/adaptation of this could be to create a pleated glass facade that would aid in distributing light evenly throughout the space.
I decided to so a small experiment in which I got some foam (similar to that used by industrial design students) and used a hot wire cutter to create some pleats.
With the different angles created light would be projected in a various array of direction. The pattern is not repetitive, allowing for a more randomised diffused light.
I think that this could be a strong concept and I would like to further pursue this idea in digital modelling.
I wanted to explore the idea and concept of recreating a tree canopy within the basement space. To truely connect bath goers to the environment and create an organic atmosphere and experience.
Seeing as organic forms are usually curved I thought that it would be difficult to create through a hand made model, so I turned to Rhino.
The existing columns in the space are very harsh and abrupt on the eye, and to an extent make the space feel smaller. They are also a key structural element of the space and have to be kept in place. In an attempt to ruduce this effect I thought that it could be intersting to disguise them within this canopy/pavillion form.
I decided that it would be most effective to 3D print this model, as it would show the curvature and the organic form of the canopy in more detail.
The photo above show cases my first attempt. I have included a gallery below to show more context.
I plan to do several more study models in this area in order to see if this would be a good idea. I think that this attempt is too over the top and would actually do the opposite of its intention. I think that for the next iteration it should include more openings to allow more light to penetrate.
I will do a comparison of the new forms in a future blog post.