
Final Project 2 – Presentation
2019
For project 2 of our Sleep/Wake studies I wanted to try and continue on the theme and thinking of my first project. In doing so, I have focused on the main threshold ideas of: Movement/Stasis and Transparency/Opaque. My goal with this design was to create an intimate space that felt both warm and welcoming. I also wanted to try and activate the street. As it stands now, the WB building in which the gallery space resides, looks just like a regular old building. I wanted to create some sense of curiosity, and this is where the translucent archway comes into play. I decided to go with and archway for my entrance as this pays homage to the original windows already in the gallery space. This feature lures people in and also allows more natural light into a once dark space. The translucent curtains are in place to suggest movement. In the “outside world” everything moves at such a fast pace and when stepping inside, I wanted to suggest the notion of slowing down, and the retreat that we take to our own bedrooms at the end of the day. The curtains act as a soft substitute for the traditional wall and they allow the space to become more flexible.


After my previous attempt I went back and made a few changes to my rhino file and . hopefully now everything will fit together as intended. I also made the floor plan of our site in Rino and I plan to engrave this into the base plan of my model, this will both give the gallery context and help to further support my threshold.

In this photo above, you can see the floor-plan of the Gallery site laid out on Rino. The laser cutting software reads colours, in order to engrave the floor plan rather than cut straight through I had to made sure it was in a different colour. Everything in red Cuts and everything in purple engraves


These are some photos of my new model during assembly.
My first attempt at assembling my model was didn’t got to well. Some of the pieces didn’t fit properly and it to be honest I thought I could do better so I decided to go back to the drawing board and laser cut it again, but first i had to make some changes to the Rino file.
Unfortunately I don’t have any proper photos of this iteration, I actually dropped it and it broke so this is what was left of it 😦

The first step was to convert all my measurements into the scale of 1:50 as this is the requirement of our brief. In order to do this I took the measurements I took on the day of our gallery site visit and used an online scale converter. I have included a couple of pages of this below..


It actually got quite messy, as I had to make sure that everything was correct.
After doing all of this I could finally get onto creating all of the different pieces in Rino. As the laser cutter prints in 2D on a flat surface I technically have to make all the components of my model into a flat pack and lay them all out. This was quite a tedious process and it took me a while to get my head around it all. Below I have included a photo of what it looks liked laid out.

After triple checking everything lined up and that it would actually fit together, I booked a laser cutting session.

One down side of laser cutting is that when using materials such as MDF it tends to leave scorch marks on the underside. This means in order to use what you have made, you most likely will have to paint it. I decided to keep it simple and spray paint my model pieces white. It took a couple of coats as the MDF soaked up the paint. (also I brought $3 paint from Bunnings, so that probably didn’t help..)


After waiting for my paint to dry I could finally start to assemble my model.
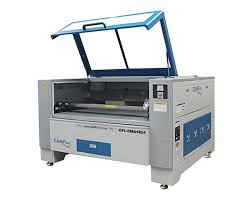
What is digital fabrication?
Digital Fabrication is the use of computer aided modelling software. Usually some type of CAD software is used to create accrete digital models. From here, these digital models can be either 3D printed or laser cut. This allows for more pin point models and complex designs.
For my scale model I plan to make use of the laser cutting. We have two on site at AUT in the digital fabrication lab. The laser cutting software requires either a Rino cad or illustrator file. I decided that it would be best to make my model components in Rino as thats what we have been using in our Digital Paper.


These are a couple of quick handmade models I made. The purpose of this was to gain a better understanding of what materials look best and how they interact with one another.
When making a model, there are many different factors to consider. The materials, the size, the style and most importantly what you are trying to say? What is the models purpose? What are you trying to showcase? Making a model is like visual sketching, it allows areas to be explored.
When making my model I took a lot of inspiration from a book by American architect Thom Mayne – Morphosis both his architecture firm and title of the book, it showcased very detailed and intricate models. It was a style of model making that I have never seen before.
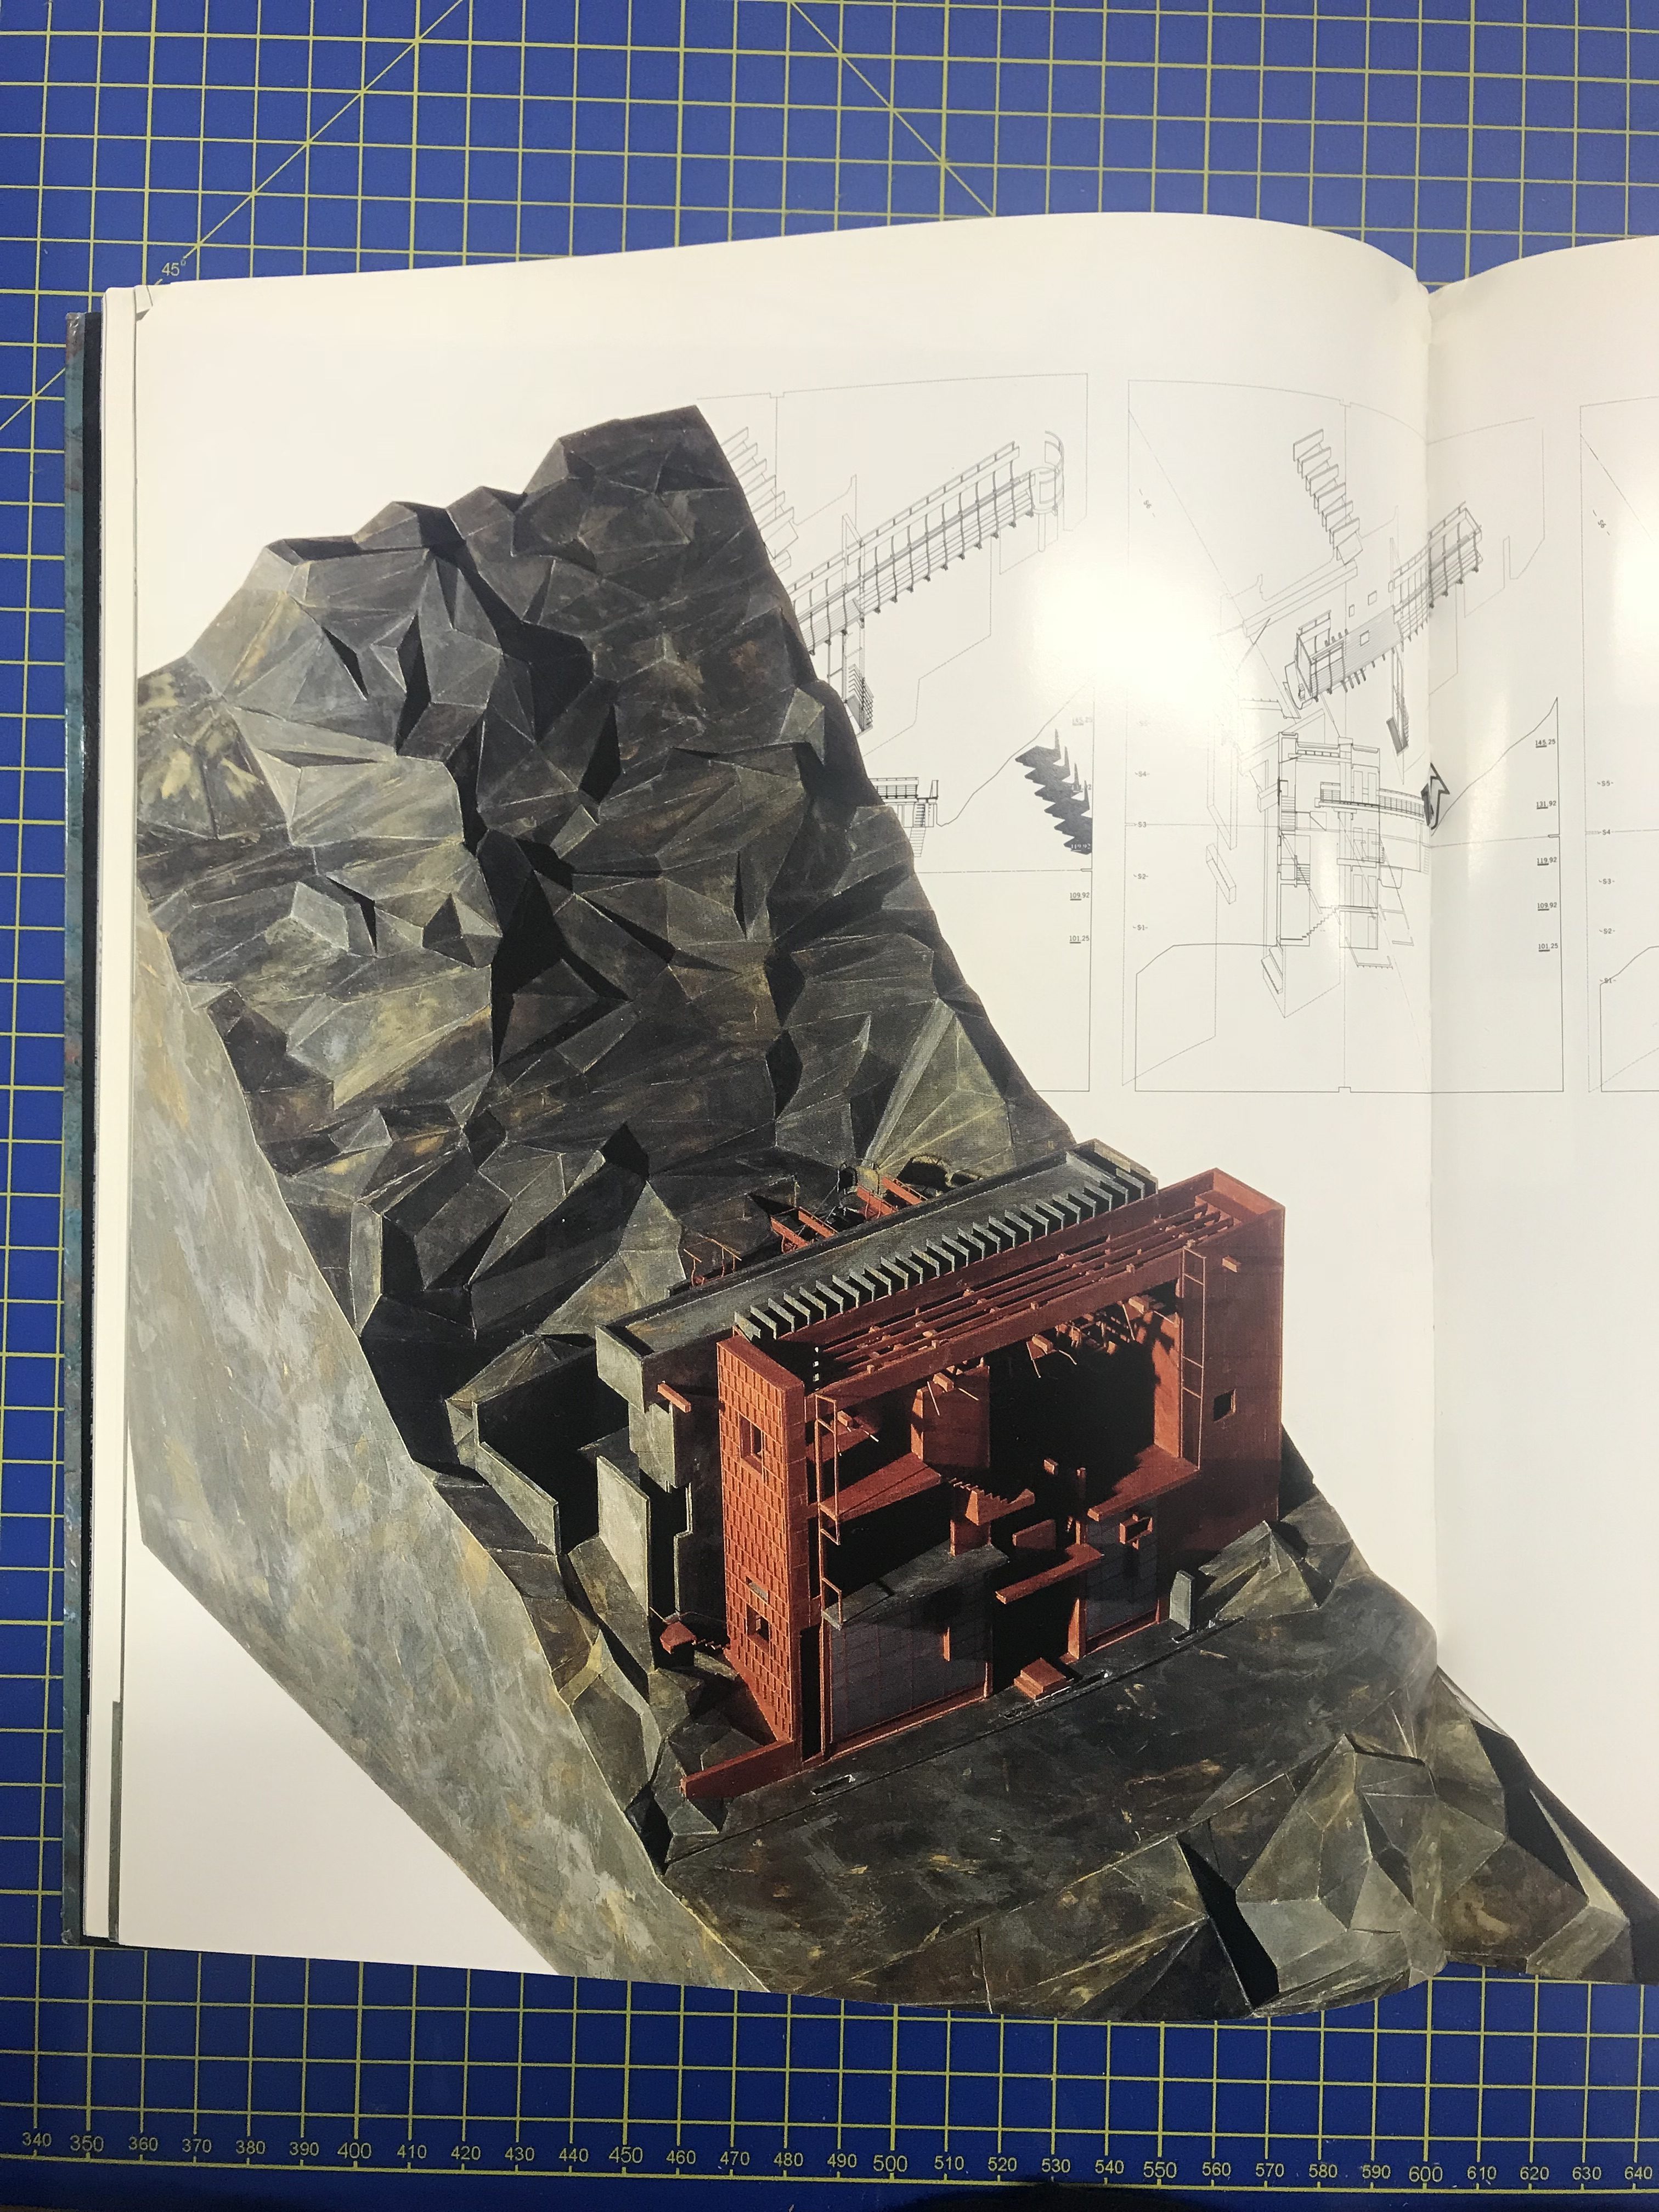
This is a style that I would like to emulate into my own models.
I have also been taking inspiration and learning from a Youtube page called 30X40 Design Workshop. I find his videos very informative and they have given me many tips on how to make models.

